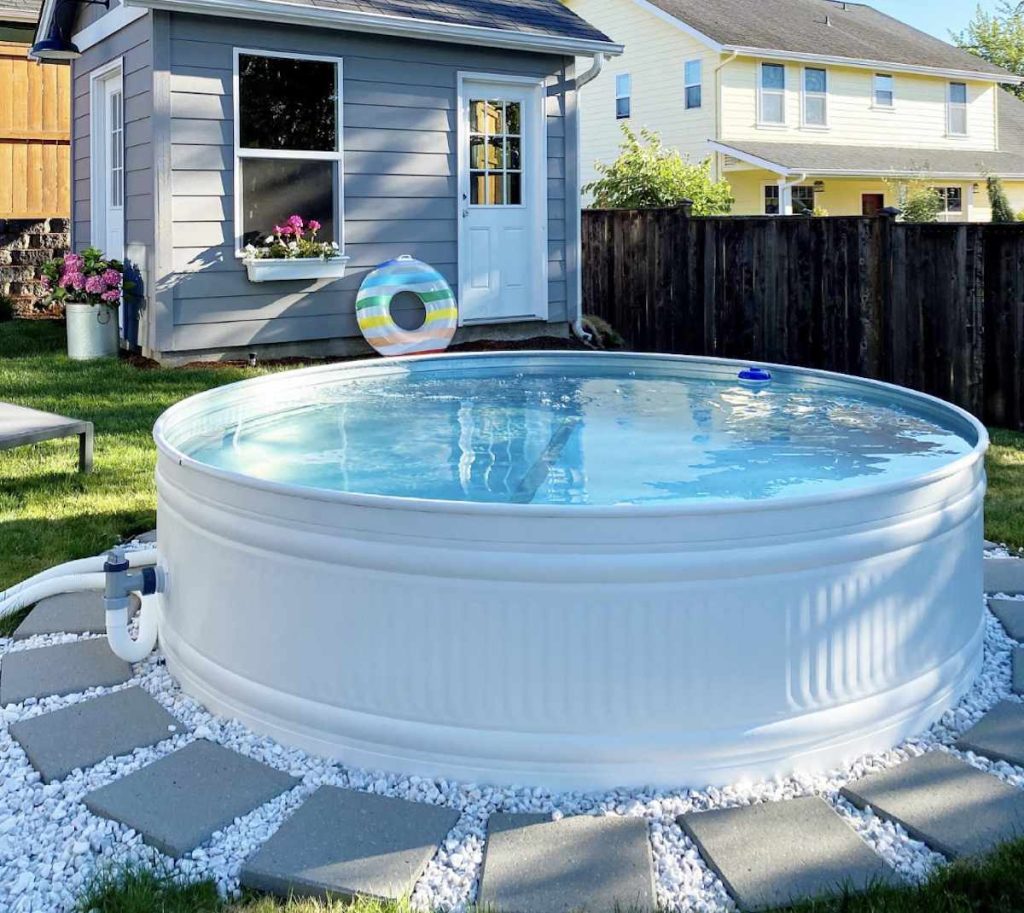
A stock tank pool, if done correctly, can have all the attributes of a pool but on a much smaller scale. With the right tools and knowhow you can add all the elements of a traditional pool to a stock tank including a filter and pump. You’re only limited by your imagination (and the size of the tank).
Keep in mind that a stock tank is much smaller than a regular pool, so it is very easy to overpower the tank with a pump and chemicals. Careful consideration must be taken when choosing the correct equipment and maintaining a DIY stock tank pool.
Here’s our guide to everything you need to know to make a stock tank pool in an afternoon.
How to Choose a Stock Tank for a Pool
Stock tanks come in many shapes, sizes, and materials and each have their own pros and cons. The stock tank you choose will affect which features you can add to your stock tank pool.
- Size: How many people do you want to fit it in? If you want to stretch out and not just sit in the tank, it should be at least 8 feet in diameter so you don’t touch the edges. That larger size will accommodate more people.
- Shape: Stock tanks generally come in two shapes, oval or circular. Oval stock tanks are better for one person to stretch out, while circular stock tanks can hold more people comfortably.
- Depth: You want it deep enough for your shoulders to be submerged without having to lie down, so anywhere in the 26- to 28-inch range should be good. When in doubt, you can always sit down and measure from the seat cushion to your shoulders (or where you would like the water to be up to) to see how deep it will need to be.
- Material: Stock tanks primarily come in plastic or galvanized metal. Plastic will be easier to work with; it’s lighter than steel and resists corrosion better than metal. However, metal stock tanks do not degrade in the sun as easily as plastic and will not become brittle and crack over time.
Where to Put a Stock Tank Pool
The best place to put a stock tank pool is a location where the ground is as flat and level as possible. It should not be near where water runoff could undermine the stability of your pool.
Be confident about the location you choose, because you won’t be able to move it once it’s filled. Water weighs 8.33 pounds per gallon. If your stock tank holds 300 gallons, the water alone will be 2,500 pounds.
Never put a stock tank pool on a deck or a roof. An average deck is only rated for about 20 pounds per square foot (dead load), and a roof is rated for even less. If your 300-gallon stock tank pool is 8’x3′, or 24 sq. ft. Take the weight of the water (2,500 pounds) and divide it by the total space — you have 104.2 pounds of pressure per sq. foot, which far exceeds the maximum load for most decks and roofs.
Warning
When you make a stock tank pool, you are using something for a purpose it was never intended for, which inherently comes with additional risk. To limit the risk of injury, read through all steps in advance and familiarize yourself with your tools before starting. Always use proper protective gear such as gloves and goggles when using power tools, and be aware of your surroundings.
What You’ll Need
Equipment / Tools
- Drill
- Hole saw
- Tin snips
- Silicon gun
Materials
- Stock tank
- Filter pump
- Hose
- Hose clamps
- Hose fittings
- Silicon tube
Instructions
How to Make a Stock Tank Pool
-
Prepare the Location
- Make the ground as level as possible.
- Dig out the high spots and add dirt or gravel to the low spots.
- Tamp down added dirt or gravel either with a hand or power tamper to limit the settling the pool will do once filled.
-
Bring the Power Source
- Run an extension cord from an exterior outlet to your pool. Make sure that the path the cord will take will not be a tripping hazard.
The only item that should need power is your pool pump which (sized right) should not need so much power that it will constantly trip your breakers.
-
Water Test the Stock Tank
A stock tank was never meant to become a pool (and they don’t have liners), so you need to make sure it can hold water.
- Fill your stock tank up to the top with water and watch it for leaks.
- Check the seams, since that’s where leaks would most likely occur.
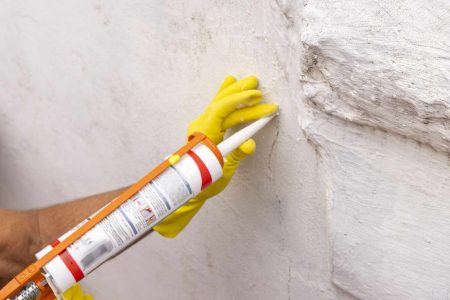
- If it leaks, plug it up by adding silicone where the water comes out. Always plug leaks from the inside of the pool so that the water pressure will press against the silicone to maintain a seal. A leaky spot plugged from the outside of the pool will eventually fail once the water pressure pushes the silicone out.
-
Cut Holes for Machinery
- Mark where you want your waterline to be. Get into the pool and sit down if that helps you visualize it.
- Mark where to drill the openings for the hose fitting/skimmer and one for the return line.
- Drill the openings.
It’s possible to use a hose fitting in lieu of a real skimmer, since the pool is so small, though it’s fine if you want to use a real skimmer. After you have marked where you want the waterline to be, the process of creating the openings for each is slightly different.
For a stock tank pool with a hose fitting as a “skimmer”:
- Mark where to drill the openings for the hose fitting/skimmer and the return line. Both openings should be located slightly below the chosen waterline.
- Drill holes for the hose fitting and the return line, using drill bits that correspond to the size of each.
For a stock tank pool with a real skimmer:
- Trace the skimmer mouth’s opening onto the stock tank at the location where you want it do be. The chosen waterline should be at the halfway point of the skimmer mouth.
- Mark where you want to drill an opening for the return line. It should be located slightly below the chosen waterline.
- Drill each corner of the skimmer’s mouths opening using the biggest drill bit you can find. Don’t let the edge of the drill bit go past the edges of the tracing.
- Take snips and cut the straight corners out.
- Drill an opening for the return line, using a drill bit of a corresponding size.
-
Install the Hose Fittings
- Install the hose fittings into the previously drilled holes. (If your filter pump kit didn’t come with matching hose fittings, a local pool store can help you source the proper size.)
- Put a small bead of silicone against the body of the stock tank for added waterproofing protection. This will help with the sometimes irregular shape and texture of the hose fitting.
-
Install the Filter Pump and Hoses
- Install the filter pump, which is an all-in-one unit that uses a cartridge to filter the water and has a built in pump for circulation.
- Connect the inlet part of the filter pump to the skimmer mouth (or hose fitting), and the outlet side will be connected to the return hole.
- Use hose clamps on all connections to ensure a water-tight seal.
The 9 Best Pool Filters of 2023 -
Fill the Tank
- Use a hose to fill the pool
- Keep an eye out for leaks specifically in any areas that were patched and at the drilled holes.
- Add water to the appropriate level that you determined when drilling the holes.
-
Start the Mechanicals
- Once the water is at the correct level, turn the pump up.
- While running, check again for leaks, specifically around the pump filter hose connections and the holes that were made in the stock tank. These openings and connections will now be under pressure so they will be more susceptible to leaks.
- If you spot any leaks, turn the pump off, drain the water to below the leak, and seal the leak with either a hose clamp or silicone, depending on location.
-
Add Chemicals
- First perform a baseline test of your water to see what you will be starting with. Certain stock tank finishes can affect the pH of the water.
- Once you have your baseline, add a small amount of pool shock or a piece of a chlorine tablet.
- Run the pool for a few hours then check the chemical levels again.
- Continue to add shock or chlorine tablets until the chlorine level is between a 3 and 4.
- Repeat the process for pH, alkalinity, and calcium.
While the other chemicals are not absolutely necessary for this application, it will help with maintenance in the long run
Maintaining a Stock Tank Pool
Stock tank pool maintenance will be the same as any other pool, only the amounts of chemicals added will be much smaller.
Check the pool chemistry at least weekly and to run the filter pump at least 8 hours a day, especially if the stock tank is in a location that get lots of sun. This will ensure the water stays clear and is always ready for swimming.
Since a stock tank was not intended to have holes drilled into it, it is good practice to regularly check over all connections and look for leaks, which should be repaired immediately. Regular inspection for leaks will limit corrosion caused by a leaky connection and help extend the life of your stock tank pool.
To winterize a stock tank pool disassemble the filter pump from its hoses and bring it inside, drain the pool, then roll it somewhere inconspicuous or put it in a shed or under a deck until next year. It’s so easy there’s really no excuse not to do it.
-
Are stock tank pools worth it?
A stock tank pool is a great option if you want an affordable pool that can be removed from your yard without major construction work. With proper set-up and maintenance, a stock tank pool can last for years. It’s also a low-risk way to see if owning a pool is right for you.
-
What’s the average cost of a stock tank pool?
The average cost of a stock tank pool could be anywhere from a $100 to $1000, depending on the type and size of stock tank and filter pump chosen. Generally speaking, you should be able to make a decent stock tank pool for around $500, not including the cost of maintaining it for years to come.
-
Can you use a stock tank as a pool?
Yes, you can use a stock tank for a pool. Once the stock tank has been confirmed as water tight and converted to use a filter pump, they make excellent low-budget pools.
Read the full article here


