Laying patio pavers is one of the quickest and easiest ways to install outdoor flooring and create an outdoor patio. Poured concrete slabs, brick, and natural stone have advantages, but patio pavers are cost-effective and simple to work with, so you can do the entire job yourself. Laying pavers on dirt involves digging, compacting, and planning your layout, with a 1-inch depth of sand spread across the patio area.
These instructions outline the easiest way to lay pavers, whether it’s for a walkway, a patio, or around your pool. In just a few days, you’ll have a gorgeous spot for outdoor entertaining or enjoying your backyard comfortably.
Cost Considerations
Designing and installing a paver patio is well within the capabilities of a dedicated do-it-yourselfer, and the costs of doing it yourself will be much less than hiring a professional. However, the effort and sweat equity must be factored into your estimates.
On average, it takes about 50 hours of work. You will also need to rent equipment, which costs about $350. Plus, you can expect to pay about $5 per square foot for materials. So, a small, 60-square-foot paver patio might cost about $750 once you figure in taxes and incidentals.
You can expect a patio expert to charge you more, but they have the expertise, saving you time and effort. For something small, like a 60-square-foot patio, the savings to do it yourself might be negligible. A larger project is where you might see much larger savings margins. On average, experts charge $8 to $25 per square foot for materials and installation. The price range is dependent on the type of paver material chosen.
Before You Begin
- More about pavers: Concrete pavers come in many colors and textures, some even simulating natural stone or brick. Pavers 18 inches by 18 inches or smaller are easier to handle.
- Delivery of pavers: You can buy pavers by the pallet and deliver them to your home close to the patio area.
- Cutting pavers: If you need to cut pavers, you will need a masonry saw, protective gloves, and eye covering to prevent injury.
- Tool rental: You will need a tamper or plate compactor besides the masonry saw. Other helpful tools include a wheelbarrow, shovel, a good quality water hose, and a landscape rake.
- Base material: The base material should be gravel or crushed rock, such as 3/4-inch minus construction gravel. The gravel’s sharp edges and points help the material compact well.
- Sand: You should always lay pavers on sand and purchase coarse sand in bulk. You can purchase a bag of fine sand for sweeping between the joints since so little is needed.
Safety Considerations
Moving large amounts of heavy materials can take a toll on your body. Use a wheelbarrow. When shoveling, lift from your legs, not your back. Remember that base materials (crushed gravel) are heavier than dirt, so use only partial shovel loads.
Wear breathing protection. Frequently spray the area with water to keep the dust down.
What You’ll Need
Equipment / Tools
- Hammer
- Shovel
- Two-by-four
- Tamper
- Wheelbarrow
- Rake
- Broom
- Carpenter’s square
Materials
- Pavers
- Crushed rock base material
- 1 bag fine sand (10 pounds)
- Coarse bedding sand
- Garden hose
- Twine or thin rope
- Marking paint
- Wood stakes
- 2 Metal pipes (3/4-inch I.D. diameter)
- Edging stones with concrete or mortar (optional)
Instructions
How To Lay Patio Pavers
-
Create Layout
The area where you intend to lay pavers should have a slight slope so water can run off it. Pooling will eventually create pits in the base material, creating more pooling.
First, lay out the general area with a garden hose to get a basic sense of space. Refine this layout by hammering in wood stakes and creating a design with a thin rope or twine. Ensure your lines are even, and use a carpenter’s square to get your corners just right. Then, paint an outline 8 inches beyond the staked area.
-
Calculate Materials to Buy
Use the outline to help you determine the quantity of pavers, base material, and sand to purchase. Measure the length by the width to arrive at the total square footage. Next, add 10% to account for expected wastage. If you will be laying pavers on curves or diagonals, increase the excess to 15 or 20%.
-
Dig Area
Dig out the area. If there is turf, remove the turf until you reach the soil below. Place the bubble level on the two-by-four to check for slope. Ensure the patio slopes down about 1 inch (vertically) per 48 inches (horizontally). You may need to transfer the soil or add sand to create a slope.
For the pavers to be flush with ground level, dig about 6 inches down to allow for 4 inches of base material, plus 1 inch of sand bedding, plus the 1-inch thickness of the pavers.
-
Smooth and Tamp Area
Use the shovel and the two-by-four to smooth out the area. Then, use the tamping tool to tamp down the soil.
-
Lay Base Material
Transfer the base material to the patio area with the wheelbarrow and shovel. After every two or three loads, spread out the material with the shovel and rake, keeping it even across the area.
Smooth out the base material with the two-by-four. Finish by tamping it firmly down.
-
Add Edging
Add the edge restraint of your choice to the base material. Some types of edging may need to be staked into the ground.
-
Lay Down Coarse Sand
Lay about 1 inch of the coarse (not fine) bedding sand. Be sure to keep the height even across the area, as this is the last layer; its height will determine the final height of the patio.
One way to keep the height consistent is to lay down two 3/4-inch pipes and pour the sand over the pipes. When you screed (or pull) the two-by-four over the pipes, the pipes act as guards that stop the screed from digging any farther down.
After the sand has been laid, carefully remove the pipes. Fill the voids left by the pipes with coarse sand and carefully smooth them out with your hand.
-
Lay Pavers
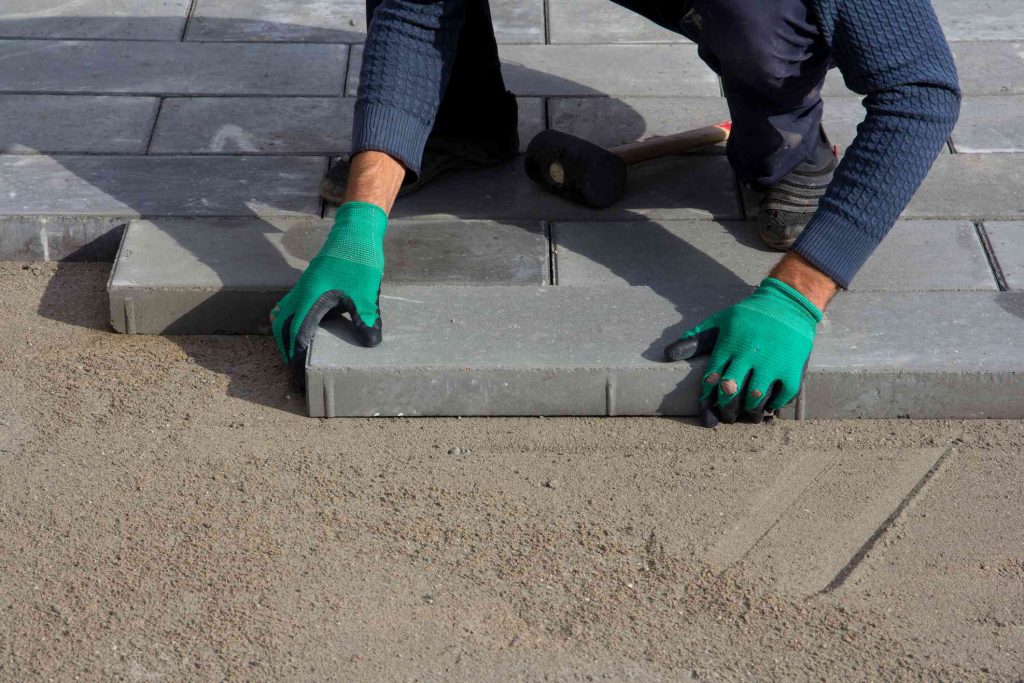
Lay the pavers on the coarse sand base. Avoid walking on the sand. Gently walk on freshly laid pavers to reach subsequent rows. Keep the pavers tight to each other, as wide joints lead to weeds between the pavers.
As you lay the pavers, occasionally tamp them down by gently tapping them with a hammer. Use a small scrap piece of two-by-four to soften the impact and as a leveling gauge so that adjacent pavers are flush with each other.
-
Add Edging Stones (Optional)
If you’ve added paver edging, a hard plastic bracket staked into the ground at the edge of the paver border, you can skip the step of adding edging stones. Otherwise, you will need edging stones to secure the patio’s borders with concrete or mortar.
-
Add Sand to Joints
With the surface of the patio pavers dry, toss a few handfuls of the fine sand on top. Sweep the sand across the surface so that the sand sifts into the joints between the pavers. When the pavers no longer move underfoot when you walk, the joints have enough sand. Sweep up and discard any excess sand.
When to Call a Professional
While laying patio pavers is a reasonably simple, straightforward outdoor project, handling the base materials and the pavers is strenuous.
A small, 60-square-foot patio can cost a professional about $480 to $1,500, while it could cost you about $700 to do it yourself, factoring in tool rental.
For larger projects, it might make more sense to do it yourself for more savings; however, it’s back-breaking work and more of it. The average size patio project is about 280 square feet, and the national average for professional installation and materials is $3,800, with prices ranging from $2,400 to $7,000.
When considering larger projects or wanting to use large-format pavers (24 inches by 24 inches or greater), a contractor or landscaping company might be your best bet to ensure it gets done right, on budget, and on time.
-
Can I lay pavers directly on soil?
Do not lay your pavers directly on the soil. To achieve a stable surface, the soil base must first be compacted, and then a layer of road base aggregate and sand must be laid.
-
What happens if you don’t put sand under pavers?
Without sand underneath your pavers, the layout will shift and warp over time and with the weather. Sand assures proper drainage and serves as a stabilizing medium for your pavers.
-
Do I need concrete under my pavers?
Pavers are best installed on top of a flexible medium to move with the ground’s temperatures. Pavers installed on a concrete surface will not be as malleable and may crack over time.
Read the full article here


