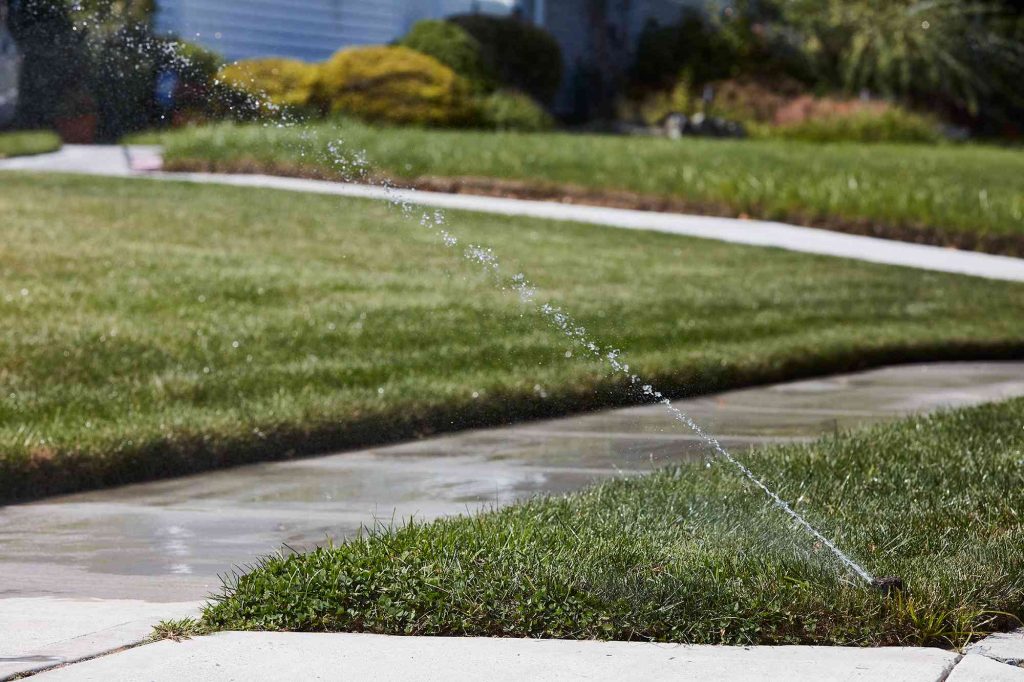
Sprinkler system repair solves common sprinkler problems like damaged risers or heads, leaking or damaged pipes, and basic electrical issues. Repairs are relatively easy since most parts are either above-ground or in shallow trenches. Most sprinkler system repairs cost $5 to $40 and can be finished in less than an hour.
When to Repair a Sprinkler System
Immediately repair a sprinkler system that has leaking or damaged lines, sprinkler heads, or risers. A broken sprinkler head can waste up to 4,200 gallons of water per month and a small hole in a sprinkler line can waste 6,300 gallons per month.
Safety Considerations
Before digging to repair a sprinkler, call or place an online request with your local 811 Before You Dig service. A technician will mark the location of underground utilities with water-soluble paint a few days before you intend to dig.
What You’ll Need
Equipment / Tools
Clean Sprinkler Heads
- 1 spring clamp or locking pliers
- 1 needle-nose pliers
- 1 bucket
- 1 old toothbrush
Replace Sprinkler Heads
- 1 garden spade
Replace Damaged Sprinkler Risers
- 1 PVC cutting tool
Replace Leaking or Damaged Sprinkler Pipes
- 1 tape measure
- 1 shovel
- 1 PVC pipe cutter
- 1 indelible marker
Diagnose Voltage or Transformer Issues
- 1 multimeter
- 1 flashlight
Materials
Clean Sprinkler Heads
- 1 sprinkler filter
- 1 mild soap
Replace Sprinkler Heads
- 1 replacement sprinkler head
Replace Damaged Sprinkler Risers
- 1 1/2-inch by 12-inch cut-off riser
Replace Leaking or Damaged Sprinkler Pipes
- 1 telescopic repair coupling
- 1 PVC standard union coupling
- 1 PVC solvent glue
Diagnose Voltage or Transformer Issues
- 1 0.75 amp replacement fuse, if needed
Replace Faulty Sprinkler Solenoids
- 1 sprinkler solenoid
- 3 wire nuts
Instructions
How to Clean Sprinkler Heads
The signs of a clogged sprinkler head are patches of brown grass around the sprinkler head or a sprinkler head that will not rise or only partially rise. Dirt and fine sand will clog the filter in the pop-up section of the sprinkler head.
Sprinkler filters are small, mesh plastic devices that drop into the top of the pop-up. Filters cost about $1 or less.
Cleaning or replacing the filter in the sprinkler head will restore the uniform spray pattern and allow the sprinkler heads to rise. You will need a spring clamp or locking pliers, needle-nose pliers, a bucket, mild soap, and an old toothbrush.
-
Lift Sprinkler Pop-Up
Lift the sprinkler pop-up section by hand to its highest position.
-
Access the Filter
Unscrew the top threaded section of the pop-up to access the filter.
-
Remove the Filter
Remove the filter. Use needle-nose pliers if necessary.
-
Clean the Filter
Clean or replace the filter. To clean the filter, use a toothbrush, soapy water, and clean water to rinse.
-
Flush Out the Sprinkler
Turn on the sprinkler system before replacing the filter to flush out the system.
-
Replace the Filter
Replace the filter and screw the threaded section back into place.
-
Unclamp the Riser
Unclamp the riser to let the sprinkler head fall back into place.
How to Replace Sprinkler Heads
Signs that it is time to replace a sprinkler head are when grass around the sprinkler is discolored or patchy, the sprinkler head does not rise or only partially rises, or when the sprinkler head has become damaged.
A sprinkler head has a large plastic cylindrical base that connects to the water line and a top telescoping cylinder that rises to spray water. The pieces are unified. So, even if just the top part is damaged, the whole sprinkler head unit must be replaced.
Sprinkler heads cost from $5 to $35 each. Purchase a sprinkler head that is specific to your system. Most sprinklers have a pop-up gear-driver rotary head or a pop-up fixed head. Sprinklers have either 1/2-inch or 3/4-inch inlets. Half-inch is common with pop-up fixed sprinkler heads.
-
Cut Around the Sprinkler Head
Use a garden spade to cut out a wide circle around the sprinkler head. Cut the turf carefully to avoid slicing buried sprinkler lines.
-
Unscrew the Sprinkler Head
Unscrew the sprinkler head by hand until it releases.
-
Remove the Sprinkler Head
Gently lift the sprinkler head out of the hole.
-
Insert New Sprinkler Head
Place the new sprinkler head into the hole and onto the male thread at the base.
-
Tighten the Sprinkler Head
Hand-tighten the sprinkler header until it is firmly in place. Do not over-tighten.
How to Replace Damaged Sprinkler Risers
Signs of a damaged sprinkler riser are overly wet patches of grass or mud or excess grass growth directly around the sprinkler head.
A sprinkler riser is a 1/2 inch or 3/4 inch diameter PVC pipe that extends from the top of the sprinkler pipe to the bottom of the sprinkler head.
Sprinkler risers come in lengths from 1/2 inch to 24 inches. Cut-off risers are a good option when you’re not sure of the riser’s exact length. Cut-off risers have six to eight segments that can be easily snapped off to adjust the length of the riser. A 1/2-inch by 12-inch cut-off riser is a versatile length and costs $1 to $2 each.
-
Remove the Body
Remove the sprinkler head body.
-
Grasp the Riser
Reach into the hole vacated by the sprinkler head and grasp the riser.
-
Turn the Riser
Turn the riser counterclockwise.
-
Cut to Size
Measure the new sprinkler riser against the old riser and cut it to size with a PVC pipe-cutting tool.
-
Tighten the Riser
Place the end of the riser in the hole and tighten it by hand.
How to Repair Low Water Pressure
Signs of low water pressure in a sprinkler system are brown circles around sprinkler heads, non-uniform spray patterns, and sprinkler heads that fail to rise.
-
Clean the Sprinkler Head
Clean the sprinkler head and filter or replace the filter if the low water pressure is localized at just one or two sprinklers. Or replace the entire sprinkler head if cleaning the old sprinkler’s filter doesn’t improve the water pressure.
-
Run Sprinklers
Run the sprinklers during non-peak water use hours. Peak hours are generally from 9:00 am to 5:00 pm, though every area is different.
-
Open the Isolation Valve
Open the isolation valve all the way. The isolation valve is in the covered valve box. A knife valve handle should be parallel to the pipe and a round handle valve should be turned completely leftward.
-
Open the Main Water Shut-Off Valve
Open the house’s main water shut-off valve all the way. Water for sprinklers comes from the curb-side water meter, goes into the house through the water shut-off valve, and is once again sent outside to the sprinklers. Make sure that the water shut-off valve is opened to full.
How to Replace Leaking or Damaged Sprinkler Pipes
The signs of leaking or damaged sprinkler pipes are muddy, soggy patches located anywhere in the lawn or patches of lawn that are higher or greener than other areas.
A telescopic repair coupling lets you cut into the broken line, shorten the coupling in order to place it on the line, then length it again permanently.
-
Dig a Trench
Dig a trench around the suspected line break.
-
Turn off the Water
Turn off the water to the sprinkler system.
-
Add Cut Marks
Add the cut marks to the PVC sprinkler line. One mark should be on the inside edge of the slip coupling and the other mark should be at the end of the telescope base.
-
Cut the Line
Cut the sprinkler line on the marks with the PVC cutter.
-
Clean the Pipe
Clean the pipe of all dirt.
-
Collapse the Coupling
Collapse the repair coupling to its shortest length.
-
Apply PVC Solvent
Add PVC solvent to the ends of the cut pipe and to the inside ends of the coupling.
-
Extend the Coupling
Working quickly, place the coupling between the cut pipe and extend the coupling.
How to Diagnose Voltage or Transformer Issues
Signs that the sprinkler system is experiencing voltage or transformer problems are when individual sprinkler zones will not turn on or when the entire system does not turn on.
The issue may be with the sprinkler controller or with the field wiring. You will need a multimeter, flashlight, and 0.75 amp replacement fuses.
-
Check the Controller
Make sure that the controller is programmed correctly.
-
Check the Power
If none of the sprinkler zones will run, check the power source that feeds that sprinkler system’s transformer.
-
Check the Wires
Examine the wires on the transformer to ensure that all are properly attached to the terminals.
-
Test for Voltage
If some zone are working and others are not, use the multimeter to test for the correct voltage to the non-working stations. Most residential sprinkler systems are 24V systems which should output a signal in the 24V to 28V range.
-
Check for Wiring Problems
If the controller is sending the proper current to the non-working stations, check the continuity of the circuit to identify any wiring problems.
-
Replace the Fuse
If the controller has a fuse, the fuse may be blown. Remove the fuse and replace it with a fresh fuse.
How to Replace Faulty Sprinkler Solenoids
One sign of a faulty sprinkler solenoid is when an individual sprinkler valve will not turn on even if the rest of the electrical system is working properly. You’ll know if an individual sprinkler solenoid is faulty if three conditions are present: it has worked before, other valves are working, and the main controller is working.
A sprinkler solenoid is an electric device that tells a sprinkler valve to open or close based on commands from the system’s main controller. A sprinkler solenoid costs from $15 to $35.
-
Turn Off the Water
Turn off the water to the sprinkler system.
-
Locate the Solenoid
Locate the sprinkler solenoid in the covered valve box.
-
Locate the Wires
Locate the wires that connect the main controller to the solenoid. The bundled wires will the connected with a plastic wire nut.
-
Untwist the Wires
Screw the wire nut off of the bundle and untwist the wires.
-
Remove the Solenoid
Remove the old solenoid by turning it counterclockwise.
-
Replace the Solenoid
Install the new solenoid by turning it clockwise by hand.
-
Connect the Solenoid
Connect the solenoid’s white wire to the system’s white wire with a wire nut.
Connect the other solenoid wire to the system’s power wire, which may be red or black.
-
Test the Sprinkler
Turn on the sprinkler system and test it.
-
How often should sprinkler systems be serviced?
Sprinkler systems should be serviced twice a year. Service the sprinkler system before turning on the system for the season, usually in spring. Service the system again to winterize it, typically in early fall.
-
What is the life expectancy of a sprinkler system?
The life expectancy of a sprinkler system is 10 to 15 years, with some sprinkler systems lasting as long as 20 years before a full replacement is needed. Individual parts may last just a year or two, especially high-impact parts like sprinkler heads and sprinkler risers.
-
How do I know if my underground sprinkler system is leaking?
You will know if an underground sprinkler system is leaking with visible signs at ground level: spongey or wet patches of grass, excess grass growth, muddy ground; or wet concrete. Water from the leaking sprinkler system may be actively bubbling or spraying, as well.
Read the full article here
