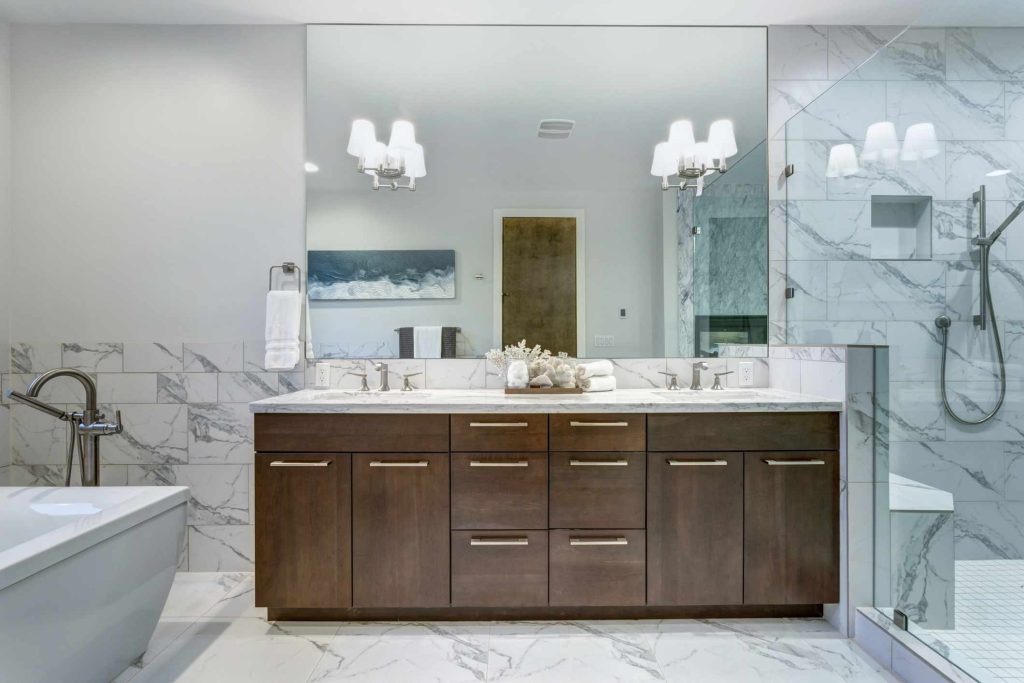
A frameless mirror gives a room a clean, modern, polished look. Lacking a frame, the mirror blends effortlessly into the room and merges with the room’s overall style.
Hanging a frameless mirror can be a bit tricky since the mirror has no surface that takes nails or screws. But with special mounting clips or with glass/mirror adhesive, you can hang a frameless mirror that has little or no visible support.
Two Ways to Hang a Frameless Mirror
You can hang a frameless mirror either with metal mounting clips or with glass/mirror adhesive.
-
Clips visible, though barely
-
Good for high-moisture environments
-
Wall stud attachment recommended
-
Adjustments easy
-
Removal easy
-
No visible clips or support
-
Poor for rooms with uncontrolled moisture
-
Attaches to drywall, so no need to find wall studs
-
Adjustments impossible
-
Removal very difficult
Adjustable Metal Mounting Clips
Four metal mounting clips are enough to hold most frameless mirrors: two at the top, two at the bottom. The lower edge of the mirror rests in the bottom clips, which are fixed in place. The top clips slide up to allow the mirror to rest against the wall. Then they slide down by gravity or by spring tension to hold the mirror in place.
Adjustable mounting clips are sturdy, dependable, and safe. Attaching the clips to studs rather than drywall is best. For high-moisture environments, clips provide a slight space behind the mirror for airflow, reducing the chance of mold growth behind the mirror. Clips allow for easy removal of the mirror.
The main downside of mounting clips is that a small portion of the clips will be visible on the front edge of the mirror.
Glass/Mirror Adhesive
For a perfectly clean look, glass/mirror adhesive lets you hang a frameless mirror with no visible mounting hardware. The adhesive sets in 15 to 30 minutes but requires 24 to 48 hours to fully cure. Placement is more forgiving than with the mounting clip method because there is no need to attach to wall studs or use drywall anchors.
One downside is significant: Removal is extremely difficult. The mirror must be broken off of the wall in pieces, bringing with it drywall chunks, paint, and drywall face paper. If there is ample room behind the mirror, you may be able to remove the mirror by running a piano wire behind it and sawing the mirror away from the wall.
Unless you absolutely do not want visible fasteners, the mounting clip method is preferable to the adhesive method. It’s stronger, more reliable, faster, and gives you more flexibility for adjusting or removing the mirror later on.
Safety Considerations
When hanging a frameless mirror, work slowly and carefully to avoid chipping, cracking, or shattering the mirror. Wear eye protection. Have an assistant help you, especially with larger mirrors or when reaching over a bathroom counter.
What You’ll Need
Equipment / Tools
Hanging a Mirror With Clips
- Drill
- Bubble level or laser level
- Stud finder
- Pencil
- Measuring tape
Hanging a Mirror With Adhesive
- Drill
- Oscillating sander
- Paint roller
- Medium and thick nap roller covers
- Bubble level or laser level
- Paint tray
- Paint tray liner
- Caulking gun
- Pencil
- Measuring tape
Materials
Hanging a Mirror With Clips
- Frameless mirror
- Adjustable mounting clips
- Painter’s tape
Hanging a Mirror With Adhesive
- Frameless mirror
- Mirror/glass adhesive
- Drywall primer
- Scrap one-by-two or one-by-four board
- Painter’s tape
- Drywall anchors (if needed)
Instructions
How to Hang a Frameless Mirror With Mounting Clips
-
Determine Mirror Location
With the measuring tape and with strips of painter’s tape, mark off the perimeter of the mirror on the wall.
-
Mark Stud Locations
Use the stud finder to locate all of the wall studs behind and next to the intended mirror location. Mark each stud location just above the top perimeter line and just below the bottom perimeter line. Mark lightly on the wall or on a short strip of painter’s tape.
-
Shift Mirror Location If Needed
The bottom mounting clips should be positioned about three to six inches from each side of the mirror. Since studs are 16 inches apart from each other, mirrors that are 36 inches wide or wider will be able to meet two studs. Shifting the mirror left or right may help the mounting clips contact two studs.
-
Add Bottom Clips
Use the bubble level or run a horizontal laser line to find the locations for the two bottom clips. Each clip should intersect with a wall stud and the level line. Drill a small pilot hole at each spot. Follow by screwing in bottom mounting clips at each spot. Bottom mounting clips usually are fixed, whereas the upper clips are adjustable.
-
Mark Location of Top Clips
Rest the mirror on the bottom clips. Have an assistant hold the mirror in place while you add two short strips of painter’s tape at the top. One strip should be located on the same stud directly above the bottom-left mounting clip. The bottom of the tape should be flush with the top of the mirror. Repeat on the right side. Remove the mirror.
-
Add Top Clips
Use the top strips of painter’s tape as guides to indicate how high to mount the top clips. Keep in mind that each clip slides open and closed. In closed mode, the clip should be about 1/16-inch above the top edge of the mirror. Screw the top mounting clips into place.
-
Hang Frameless Mirror
Small frameless mirrors: For small mirrors that are easy to handle, press the top edge of the mirror upward into the top clips, thus raising them. Then swing the bottom edge of the mirror toward the wall and set the edge into the bottom clips.
Large frameless mirrors: For large mirrors that are hard to handle, have an assistant lift up the two top clips (or hold them up with painter’s tape). Rest the bottom edge of the mirror into the two bottom clips. Swing the top edge of the mirror toward the wall. Release the two top clips. Make sure that each clip fully covers the top edge of the mirror.
How to Hang a Frameless Mirror With Adhesive
-
Mark Mirror Location
Use a tape measure and pencil to lightly mark the intended perimeter of the mirror. Use a bubble level or laser level to ensure that the mirror will be level. Maintain a space of at least 6 inches below the mirror to allow for the temporary mounting brace.
-
Sand Away Paint Behind Mirror
With the oscillating sander, sand off paint within the marked perimeter, remaining clear of the 2 to 3 inch inside border closest to the pencil line. To avoid abrading the drywall paper, use fine-grit sandpaper and hold the sander lightly.
-
Apply Primer
Add the paint tray liner to the paint tray. Pour drywall primer into the tray. Fit the paint roller with the medium nap roller cover. Prime the sanded area within the mirror perimeter. Let the primer dry overnight.
-
Add Temporary Mounting Brace
With the drill, screw a one-by-two or one-by-four board the width of the mirror onto the wall. The top edge of the board should be flush with the bottom edge of the marked perimeter. This will be the very bottom of the frameless mirror.
-
Apply Adhesive to Mirror
Fit the glass/mirror adhesive tube into the caulking gun. On the back of the mirror, apply long vertical beads of adhesive 2 inches apart from each other. Keep the adhesive 2 inches away from the edges of the mirror.
-
Set Mirror on Wall
Rest the bottom edge of the mirror on top of the mounting brace. Tilt the mirror toward the wall and press it lightly against the wall.
-
Press Mirror With Roller
Fit the paint roller with the thick nap roller cover. Roll the face of the mirror several times with the dry roller cover to press the mirror against the wall.
-
Add Painter’s Tape to Mirror
Run three strips of tape to the edges of the mirror (left, top, and right) to hold the mirror in place while the adhesive cures.
-
Remove Temporary Mounting Brace
After 24 to 48 hours, remove the painter’s tape and unscrew the mounting brace. Patch the screw holes with drywall compound or spackle. When the patch material is dry, paint to match the wall.
When to Call a Professional
Large frameless mirrors beyond 60 inches wide or heavy mirrors can be difficult to handle and hang. Have a general contractor or fix-it person hang these types of frameless mirrors.
Read the full article here
