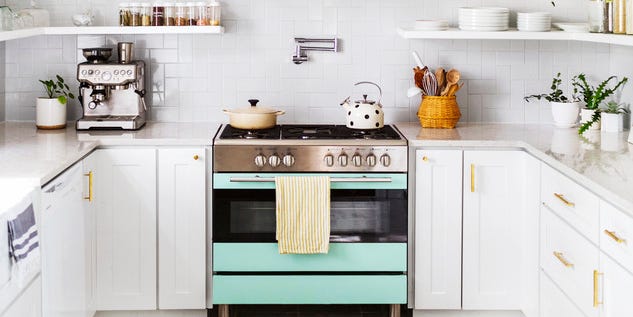
With retro kitchens making a comeback, there’s a surge of colorful appliances that make a statement. While you may dream of a charming pink refrigerator or mint green stove, kitchen appliances are a big investment — especially if your current machines are fully functional. That’s why homeowners have taken to painting major appliances, from washing machines and dishwashers to smaller fixtures, like a stand mixer or microwave.
If you’ve scrolled Instagram or TikTok recently, you may have seen an influencer or two take a paint roller to their kitchen appliance. One such content creator is Krista Mcewan, who gave her 10-year-old refrigerator, stove and microwave a total face lift for less than $100. “I had my eye on white and gold appliances for a while, but I was having a hard time justifying the prices,” she says. “I’m so happy with the result. It’s been a year and there’s no scratches, peeling or chips.”
If you’re hunting for a budget-friendly way to revamp your kitchen design, painting your appliances is a genius idea to add a fresh splash of color. Alternatively, you can apply a neutral coat of paint to old appliances to squeeze a few more years out of them — saving hundreds (or even thousands) of dollars in the meantime.
What to consider before painting appliances:
Before rolling up your sleeves to tackle this viral DIY project, there’s a lot to consider — from prep work to finding the right paint. Here, Dan DiClerico, the Good Housekeeping Institute’s Home Improvement and Outdoor Lab director, shares his expert advice, so you can personalize your home without stress.
Never paint a brand-new appliance.
Just in case something goes wrong, we wouldn’t recommend painting a newer appliance. An older appliance that still runs well but looks a little drab is the best candidate for a fresh coat of paint.
Prep the appliance.
After cleaning the surface thoroughly, lightly sand the surface with 180-grit paper. The slight abrasion will give the primer something to grab on to. The primer coat is key. Go with a water-based bonding primer designed for metal and other hard, glossy surfaces, like Sherwin-Williams Extreme Bond Primer.
April Haus, popular for her home decorating videos, recently painted her KitchenAid mixer for the second time and a mini fridge in her laundry room. Her best piece of advice? Don’t skip the prep work. “Having a clean surface with a de-glossed finish is imperative for the paint job to last.”
Protect your surrounding space.
While you can paint smaller appliances outside, you may have no choice but to paint large appliances (like dishwashers and stoves) indoors. First, make sure the appliance is unplugged. Remove any handles or badges, then protect the floors and surrounding cabinets with drop cloths and painter’s tape.
Buy the right paint.
Enamel paints are best for the finish coat. They’re specially formulated to dry to a durable, glossy finish. Ideal for DIYers, enamel paints combine the easy application of water-based paints with the hardness of oil-based paint for a tough finish that does a good job repelling moisture, stains and scuffs.
Influencer Erica Stolman Dowdy paints the majority of her white washing machine a pretty pink shade, using painter’s tape to section off the top area. After allowing it to dry, she carefully peels back the paint to reveal what she calls a “strawberries and cream washing machine.”
Don’t rush the process.
The project is DIY-friendly, but to do it right, you’re still going to eat up the better part of a weekend, especially with the drying time needed between coats. Hint: Using a paint sprayer can speed up the project.
Alyssa Gautieri (she/her) is the associate lifestyle editor for Good Housekeeping, where she covers all things home and interior design. Prior to joining GH in 2022, she wrote for publications including ELLE Decor, Chairish, BobVila.com, Unique Homes Magazine and LODGING Magazine, in addition to crafting product copy for home brands like BrylaneHome and VIGO Industries.
Read the full article here


